Light painting is a technique that photographers have been using for many years. It originally came from industrial photographers who needed to shoot large interiors and cover them in light. They could do a long time exposure, and fire multiple flash bulbs to build light up during the exposure one area at a time. In the 1980’s, it became popular again with still life photographers with a devise called the Hosemaster. This devise allows the photographer to apply beam of light with control onto a subject with a fiber optic light source similar to how an artist applies paint to a canvas using an airbrush. This technique lets photographers put light exactly where it is needed during a time exposure. Product photography was suddenly given a boost of creativity and problem solving solutions. The down side was that it is a hit or miss operation, back then requiring many Polaroid’s and tests on film to get the exposure perfect with every image being unique. Photoshop’s layer masking can achieve a similar lighting effect besides providing problem solving abilities with results that are editable and repeatable. The basic steps to create a light painted effect in Photoshop as are very simple, but the effect is quite dramatic.
Step 1
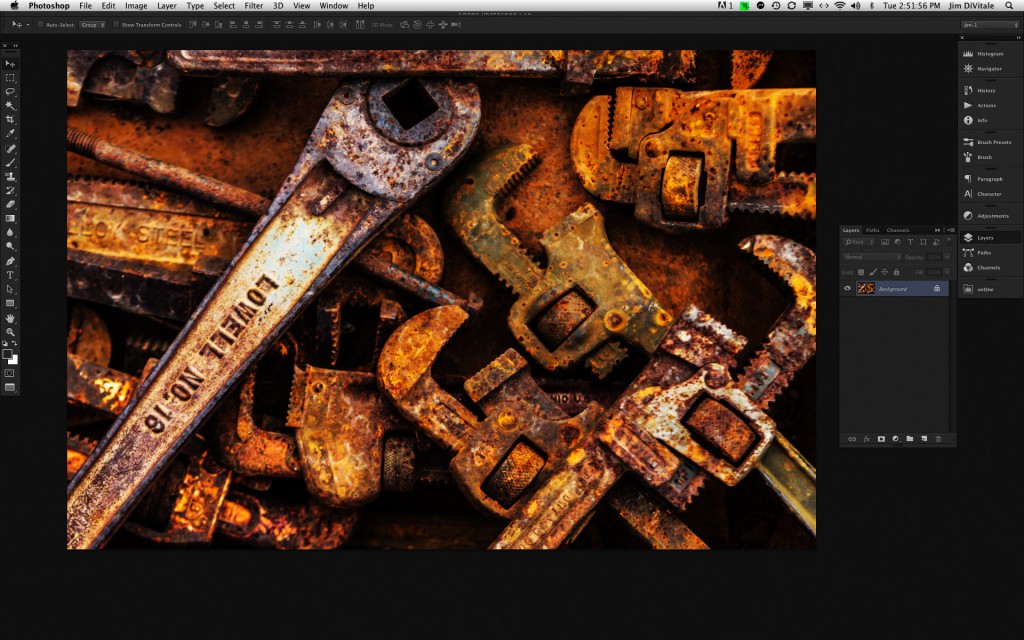
The technique starts with a basic image that is processed and opened in Adobe Photoshop. In this example, we have an image of rusty wrenches that are photographed on an overcast day.
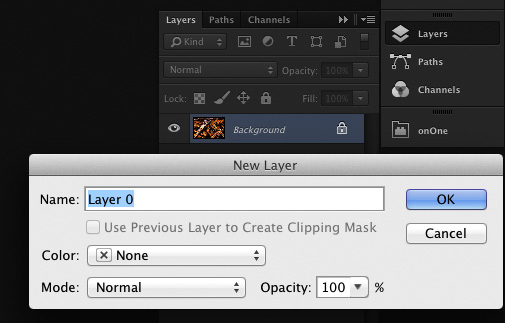
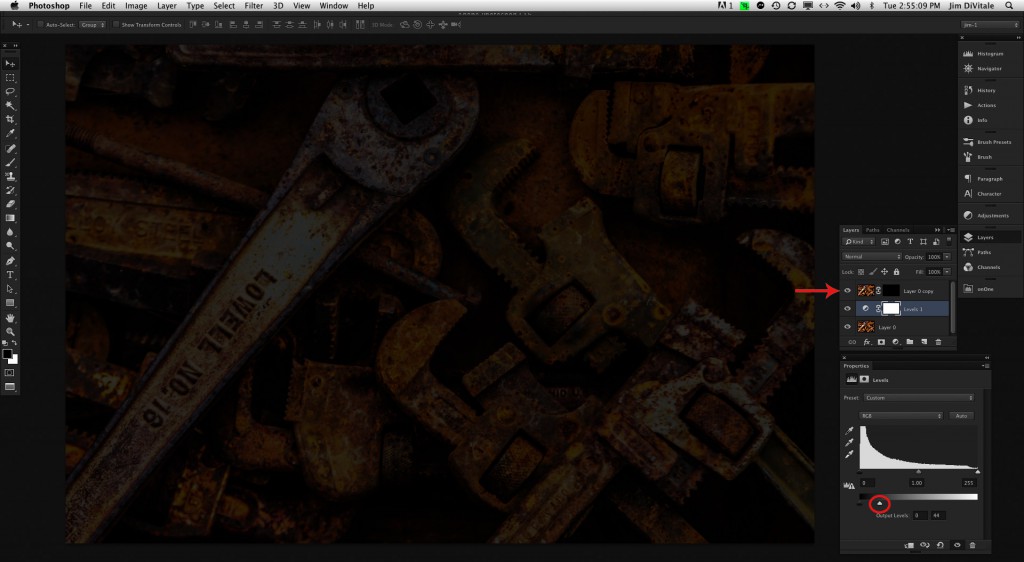
The overall light is very flat and has no specific direction. The background image is turned into a layer by double clicking it in the Layers Panel.
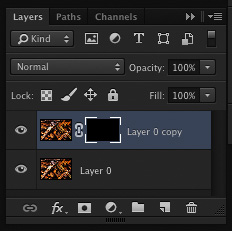
The layer is duplicated by pressing Command-J (PC: Control-J). With the top layer selected, a black layer mask is added by clicking the New Layer Mask icon in the Layer Panel while pressing the Option key (PC: Alt key).
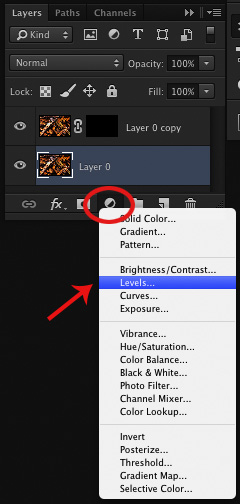
This hides the visibility of the top layer. With the bottom layer selected, add a Levels Adjustment Layer and darken the layer to almost black by using lower sliders and mover the right slider to the left to subtract the light. This serves as a bottom exposure for the brighter exposure to build upon.
Step 2
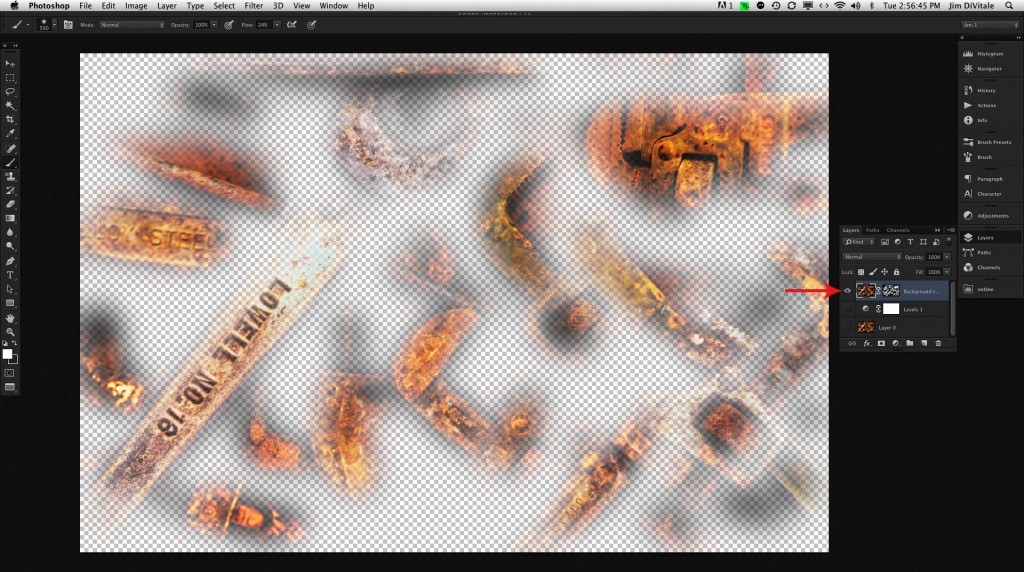
With the top layer selected, click on the black layer mask to make it active. Paint with a soft brush using white at about 25% opacity to selectively paint in the highlight areas of the subject, remembering that painting with white reveals while painting with black conceals the image. If too much is applied, then switch to black by pressing the “X” key and paint with black to remove the brighter areas.
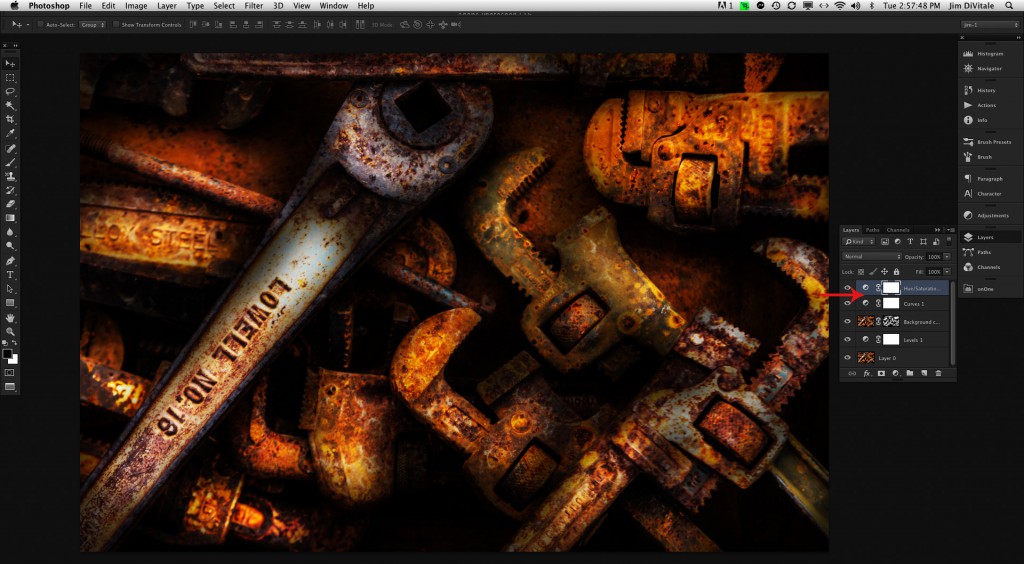
This is a slow and gradual process building light in the areas needed as you go. If the brush strokes look harsh, you can soften the mask by double clicking it and feathering the Mask in the Properties Panel. By only adding exposure in small areas, you add a lot of simulated direction and drama in the lighting that didn’t exist in the original image. Save the file as a layered PSD file such that it can be edited again in the future. The image can be finished off with a Curves and Hue/Saturation Adjustment Layers to give it a final pop to the image.
With traditional light painting, almost every image is a compromise in lighting with a hit-and-miss approach to making it perfect. The goal is to create as much of a 3 dimensional feel as possible with the transitions of lights to darks. The image already has height and width, making it up to the photographer to create as much depth as possible with lighting. The biggest advantages of using Photoshop for this procedure over traditional light painting is that there is no restrictions on how large or impracticable the subject matter is along with the fact that you can edit the resulting image indefinitely. With this technique, you can also take an exiting image that might not have the drama you want, and create a beautiful moody lighting effect after the fact, no matter how large or impossible the lighting restrictions are.
Jim DiVitale has been an Atlanta commercial advertising photographer and instructor for over 30 years specializing in computer photo illustration. He is a PPA Master Photographer, Master of Electronic Imaging, Photographic Craftsman, Fellow of the American Society of Photographers, X-Rite Coloratti, and a sponsored instructor for Canon and Adobe. Jim also serves as Director of Education for the Digital Imaging Institute for Science and Medicine and has lectured on digital photography before audiences worldwide. Jim’s award winning digital photography has been featured in many publications including Professional Photographer, Photoshop User Magazine, Photo District News, Digital Imaging, After Capture Magazine. Graphis Photo, Print, Archive Magazine, Create Magazine, Creativity, and Rangefinder Magazine. His clients have included Cisco, Mizuno USA, Rubbermaid, William Carter Co, Toshiba, TEC America, Kenneth Cole, Bellsouth, BP Amoco, COX Media, Genuine Parts Company, JP Morgan Financial, and Coca-Cola USA.
View Jim’s portfolio and digital imaging blog at: www.DiVitalePhotography.com
