Yosemite National Park is just a few hours away from me and I love photographing there both by day and at night. I especially enjoy to shooting at night because people go to sleep, I felt as if I had the park all to myself. I photographed the image above in Yosemite National Park during the summer of 2010 at f/1.4, 20 second, ISO 1600, 24mm lens, Canon EOS 5D Mark II.
Photographing the stars as points of light without star trails can really create a beautiful image. Our eyes see the Milky Way as a band of light in the sky and the camera picks up the colorful gases and more stars making the sky even more incredible. The digital camera allows for stars to be photographed at very high ISO with lower noise than with film cameras. Here are a few of my tips for photographing the stars:
What Lens to Use?
First, use a wide-angle lens, such as 14-35mm actual focal length. This will allow for less movement of the stars and keep them more as points of light. The longer the focal length of the lens, the faster the shutter needs to be to stop the action and have the stars as points of light.
What Shutter Speed?
Next, set the shutter speed around 15-30 seconds or less. I typically use 20 seconds with a 24mm lens on a full frame sensor. If you see movement in your images after reviewing them on the LCD screen on the back of the camera, then try using a faster shutter speed.
What Aperture is Best?
This will vary depending on how much light is in the sky. For a dark night, try a wide-open aperture to get as much light into the camera as possible such as f/2.8 or f/1.4. If you have moonlight, then you can set your aperture to f/4 or higher.
What ISO Setting?
It is important to set the ISO high enough to get a good exposure because you don’t want to have to lighten the images in post processing which will increase the digital noise. I put the camera in manual metering mode and set the exposure so that it is on the plus side by one or two stops. For a very dark night without the moon, try using an ISO of 3200 or 6400 to get you in the ballpark for the exposure.
Where to Focus?
Be sure to focus on the stars. The easiest way is auto focus on a distant object during the day and tape the lens or focus on the moon at night. Be sure turn off the auto focus so it doesn’t change while your shooting. Using live view is another way.
There is something very special about photographing at night with the beauty of the stars overhead. For me, it is both calming and peaceful. I hope by following my “quick tips to photograph the stars” you are able to take some amazing photographs.
Happy Photographing!
Jennifer
 I used a fisheye lens to get more of the Milky Way in image because it has a wide-angle of view. The night was colorful with some greens and hints of purple colors in the sky. I could not see the color with my eyes, but the camera could pick them up. The yellow on the horizon line is light pollution, but I like how it adds a nice color to the image. Photographed at Bryce Canyon National Park at f/2.8, 25 seconds, ISO 6400, 15mm fisheye lens, Canon 5D Mark II.
 During the day I scouted for a location to return to at night. I was photographing with my friend Chris and when we returned at night, he no longer wanted to shoot! I walked out into the river to a rock bed to get a close foreground element of the moving water. Chris said to me, “if you fall in the river, be sure to hold up the camera and I will save it”. I guess he has his priorities! I didn’t include much of the sky because there was so much ambient light from the moon. Photographed at Zion National Park at f.2.8, 30 seconds, ISO 1600, 16-35mm II at 16mm, Canon 1Ds Mark III.
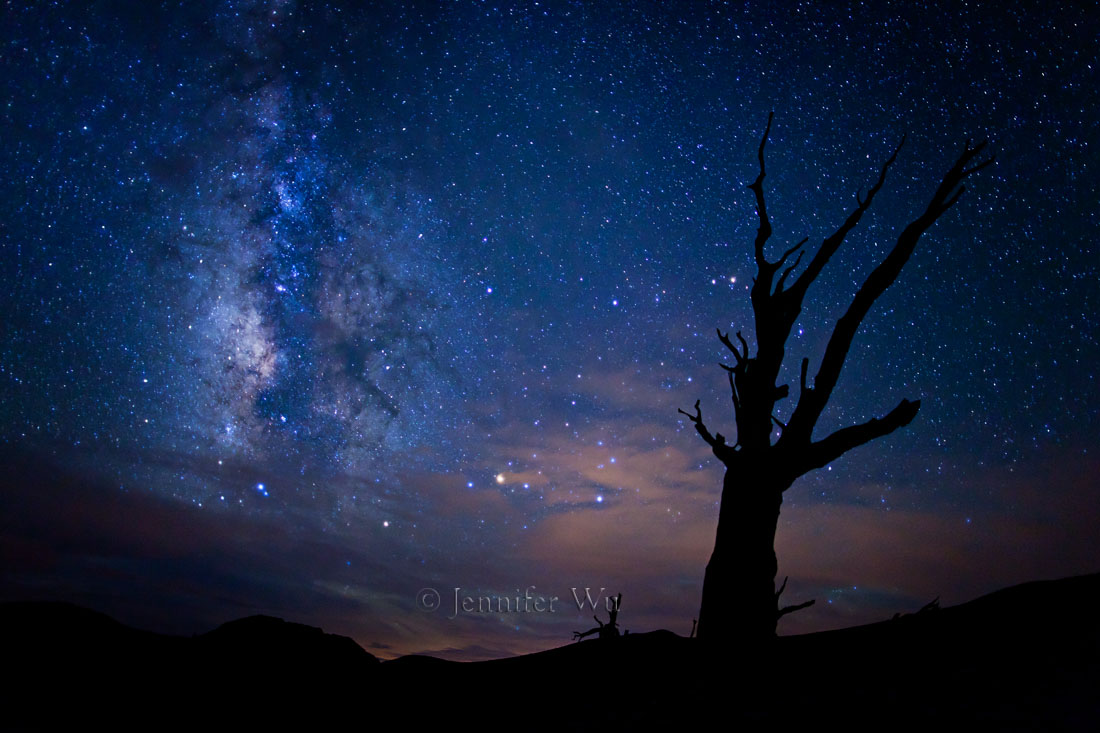
 Look for foreground elements such as rocks, mountain silhouettes or trees. The bristlecone pine tree is silhouetted against the stars with the Milky Way placed off center to balance the two elements in the scene. This image was photographed in the White Mountains, California at f/1.4, 20 seconds, ISO 2000, Canon 5D Mark II.